

Kernel security check failure is a Blue Screen of Death error message in windows computers and sometimes this error can annoy you to extreme levels. Every time you startup a windows system, the operating system runs a security checkup and if the system detects any conflicts in the data structure or system files, it returns the error message KERNEL_SECURITY_CHECK_FAILURE. This BSOD error is categorized as a serious error in the Windows environment. We have dug a little deeper on this topic to find the causes and solutions for this error so that next time someone faces this error, they know what to do.
Major Causes for Kernel Security Check Failure Error
We have collected data from hundreds of Windows troubleshooting forums to find the major causes for the Kernel security check failure error and the top five reasons are listed below. Many Microsoft Windows users around the globe face this error and after taking valuable points from their experiences, we have curated a list of solutions for this annoying BSOD error.
- Outdated Windows Drivers
- Corrupted Windows data structure or system files
- Hard disk issues
- Settings issues in Antivirus software
- Malware affected files in the system
Once you find your Windows system giving the blue screen with the KERNEL_SECURITY_CHECK_FAILURE error, it is obvious that it is facing one or more of the five issues listed above but the system will not suggest what is the real cause and it can be anything. In most cases, outdated drivers are the reason for this error but you can never be sure about it. Finding the real cause in your case and fixing it needs some guidance and we are here to help you. Follow the step-by-step instructions listed below and you can easily fix this error.
How to fix the Kernel security check failure error?
Since we are not sure about the real cause for the Kernel security check failure error in your system, we suggest you try the below methods one by one. The below methods will also work as a full diagnosis of your system to find major issues. You need to boot the PC into safe mode to try the methods listed below.
Method 1: Check and update your drivers
Did you recently upgrade to Windows 10 or 8 from a lower version? The drivers in your system may have worked perfectly for the previous version but not compatible with the latest OS version. You can manually update or reinstall the disk drivers using the inbuilt Windows Device Manager tool. Follow the below methods once your system is booted into safe mode.
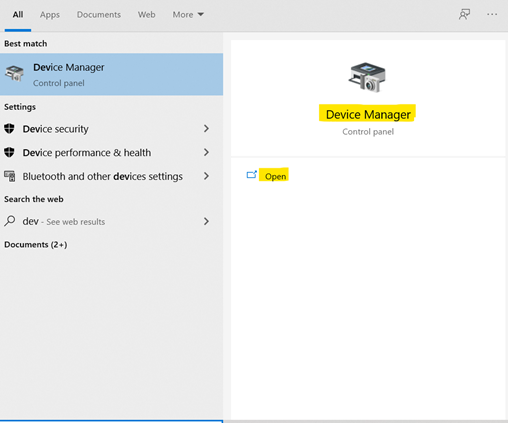
Step 1: Open the Windows Device Manager from the Start menu.

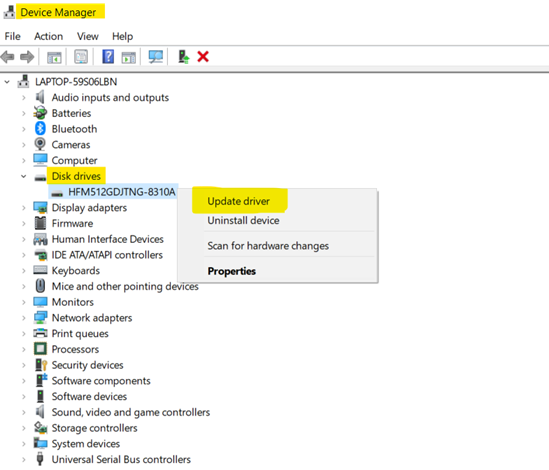
Step 2: Navigate to the Disk Drivers option and right-click on it.

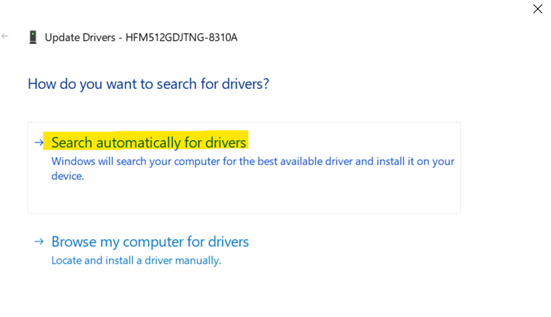
Step 3: Click on the update driver option and select the “Search automatically for drivers” option in the pop-up window.

Step 4: If you want to reinstall the driver, click on the Uninstall option, and once the driver is uninstalled, click on the ” Scan for hardware changes” option.
Step 5: Reboot the system after the update procedure and check the error status.
You can check all the drivers that may have been causing the error in your system and update them to fix the issue. If checking all the drivers manually seems hectic for you, go for third-party tools to find and fix driver issues automatically.
Method 2: Run the Memory Diagnostic Tool.
The built-in Windows Memory Diagnostic Tool will help you to find and fix the memory-related issues in your system. This tool effectively checks your RAM also for possible errors.
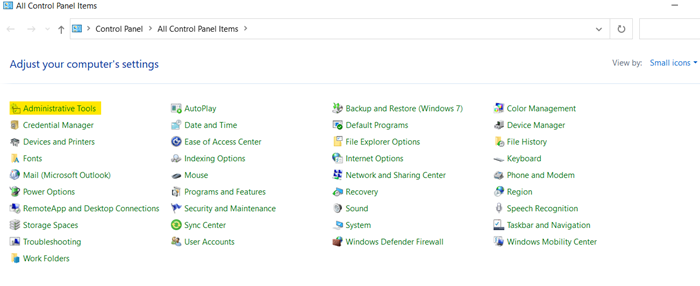
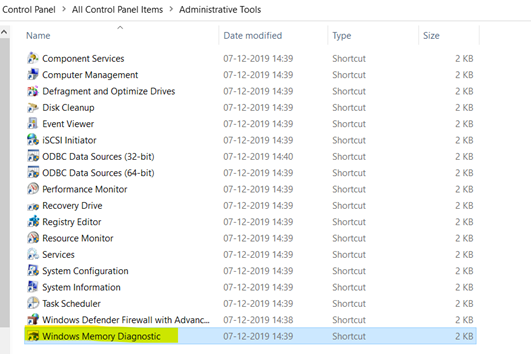
Step 1: Open the Control Panel and navigate to the Administrative Tools option or you can search “memory” in the control panel.

Step 2: Select the Windows Memory Diagnostic option to run the Tool. You will be asked to select if you want to reboot the system immediately or run the diagnostic during the next startup. Select the first option to restart and run the diagnosis immediately.

The Windows tool will run a detailed check-up and if the results show any errors, it indicates a problem in the memory chip or RAM of your PC. You may need to contact the PC manufacturer for further support in the hardware issues.
Method 3: Check the system files for errors using the SFC prompt.
System File Checker (SFC) scan is a command prompt tool to detect and fix Windows system file errors. If the kernel security check failure error is due to a corrupted or damaged file system, it can be fixed using this method. Let’s check how we can run this scan on your Windows PC.
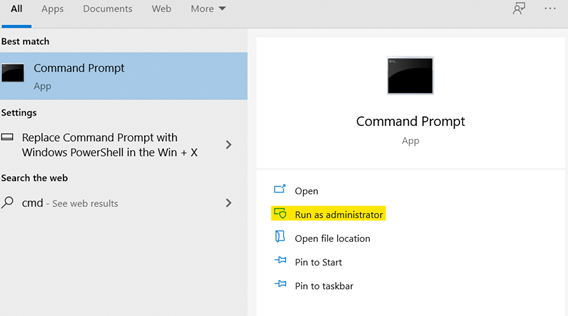
Step 1: Run the Command Prompt as administrator from the Start menu.

Step 2: Input sfc /scannow and press Enter to run the system file checker scan.

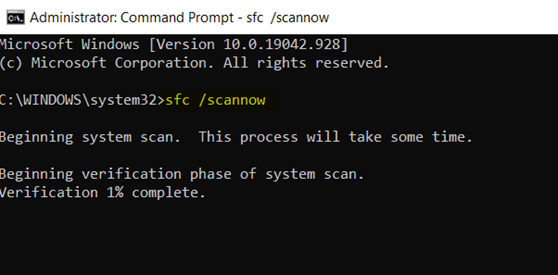
Step 3: The SFC scan will take a while to complete. Wait till the process is complicated and Windows will fix it if any issues are found.
Method 4: System Restore and Reset the PC
If the Kernel security check failure error occurred after you made a recent change in your system software, then a complete system restore will fix the issue. The below simple steps will help you to restore your PC to a previous version.
Step 1: Open the Windows Settings menu.

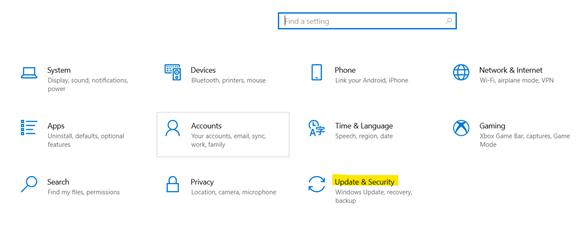
Step 2: Select the Update & Security option
Step 3: Navigate to the Recovery option on the left panel and click on it.


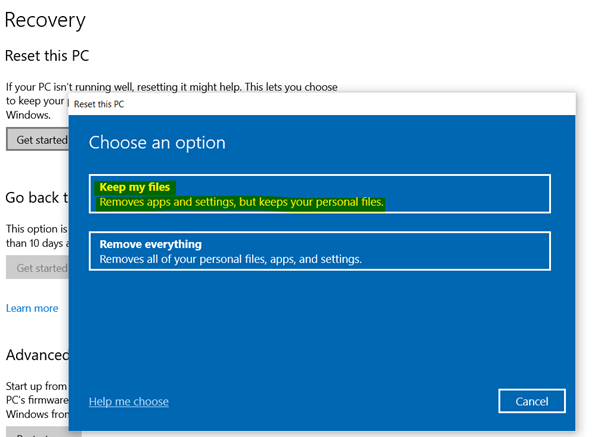
Step 4: Select the Get Started option under the Reset this PC recovery option. In the pop-up window, select the “Keep My Files option to keep your personal files and remove only the apps and settings.

Step 5: Reboot your PC after the reset and most probably you have fixed the Kernel security check failure error by now.
Method 5: Give your Windows PC a clean reinstallation.
If none of the above methods works for you, you can opt for a fresh start on your PC. Reinstall the Windows operating system after creating a backup of your data. If you need more details about how to reinstall the Windows OS on your PC, let us know in the comments
Bottomline
We believe the above methods are sufficient to fix the Kernel security check failure BSOD error in your Windows 10 PC. Do let us know which method worked for you and the issues you have faced during the troubleshooting.
Leave a Reply Cancel reply